

























The 5 Decisions Every Embroidery Patch Project Comes Down To
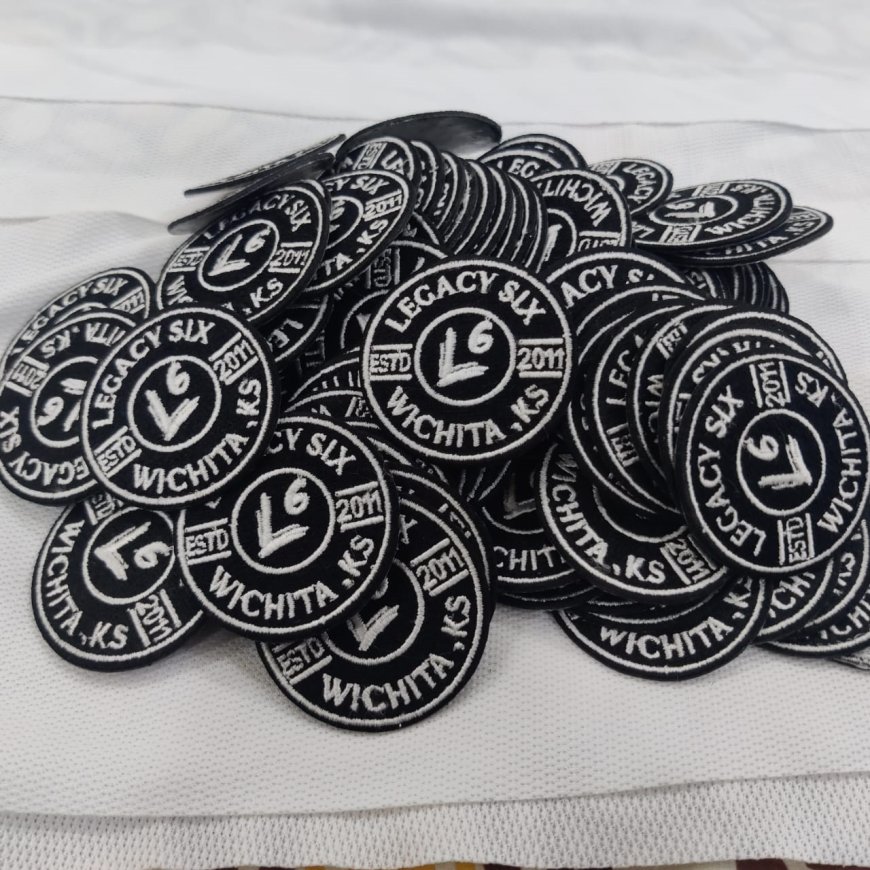
Embroidered Patches are, without question, one of my favorite projects to run. Not just because they're popular (they are, probably the single most requested item we get asked about), but because there's something satisfying about how much control you have over the outcome. And that's really the whole point of this article, if I'm being honest: patches can be wildly profitable, or they can eat your whole afternoon and barely pay for the thread. The difference comes down to planning. Preparation. Knowing what you're walking into before you sit down at the machine.

Okay so, patches. I could talk about patches for hours, honestly, and I sort of already have, across a few different videos on the channel now. There's the quick one, the ten-minute rundown. There's a longer one that goes closer to thirty minutes. And then there's the two-hour deep dive for the people who really want to sit with it. But today I wanted to do something a little different: pull all of that scattered knowledge into one place and just... lay it out. One lesson. Start to finish.
Embroidered Patches are, without question, one of my favorite projects to run. Not just because they're popular (they are, probably the single most requested item we get asked about), but because there's something satisfying about how much control you have over the outcome. And that's really the whole point of this article, if I'm being honest: patches can be wildly profitable, or they can eat your whole afternoon and barely pay for the thread. The difference comes down to planning. Preparation. Knowing what you're walking into before you sit down at the machine.
So here's what we're doing, five decisions. Five choices you need to nail down before you start a patch project, and every single one of them ties back to two questions: how do you want the finished patch to look, and what equipment do you actually have sitting outside your embroidery machine. Because let's be real, not everyone's got a laser cutter collecting dust in the back room.
Decision One: Design (Size, Shape, Stitch Coverage)
This is where it starts. Every time. What's the size of your patch? What shape is it? And, this one trips people up, how much stitch coverage are you working with?
Technically, anything can become a patch. The thing that makes it a custom patch, the defining feature, is the border. That's it. That's the whole trick. You could take almost any design and turn it into a patch as long as it's got that closed edge wrapping around it.
Shape matters more than people think. You've got your standard shapes, rectangles, circles, the reliable stuff, and then you've got the oddballs. The weird, sprawling, "my brain just went somewhere" shapes that look great but are a pain to finish later. Traditional shapes cut faster. Odd shapes slow everything down at the finishing stage. Worth remembering that when you're quoting a customer.
Now, stitch coverage, this is the one that really determines your pricing, and I break it into roughly three buckets. Around 25% coverage is your basic stuff: text, maybe a light logo, nothing dense. Somewhere in the 50–75% range, you're layering in more detail, logo plus text, more going on visually. And then you've got the 100%+ category, where you're doing a full fill stitch across the whole patch (sometimes going past 100% because of overlap). At our shop, we try to stay closer to that lower end. Cheaper, faster, less thread wasted. If you're doing full-coverage fill-stitch patches, though, and there's nothing wrong with that, you just have to price accordingly, because it takes real time.
Decision Two: Border
The border is, weirdly, the part people connect with the most, it's literally what your hand touches when you pick up a patch. So this decision matters more than it seems like it should.
If all you've got is your embroidery machine, you're mostly choosing between a basic satin stitch or a decorative border (sometimes called faux merrow, or merrowed-look, depending who you ask, every supplier seems to have their own name for it). I personally lean toward the plain satin stitch, kept at around four to five millimeters. Any thinner and it starts looking flimsy, almost see-through in a way that just feels cheap.
The faux merrow look had a real moment, I'd say the last couple years especially, and a lot of embroiderers leaned into it for small-batch runs, since actual merrowed patches are hard to source in low quantities. It looks great. It also adds stitch count, which means it adds time, which means... you guessed it, higher price. And then there's the real deal: an actual merrow machine, which is its own beast entirely. Different equipment, steep learning curve, not something you casually pick up over a weekend. Most single-head shops just aren't going there.
Decision Three: Materials
This one's short, honestly. Poly twill, or tackle twill, whatever your supplier calls it that week, is what we use basically all the time. Ninety-nine point whatever percent. The nice thing about polyester is how forgiving it is at the finishing stage; a quick pass with a lighter and the edges just melt together clean. Felt's another option, thinner, a little different feel, and we've seen plenty of shops use it, just not us, not really.
Decision Four: Cutting and Finishing
This is the big one. This decision alone can make or break how long your whole project takes.
Traditional cutting, stitch it all out, then cut by hand, works fine for basic shapes. But if you're doing odd, unpredictable shapes, or you're running serious volume, a laser cutter changes everything. Clean edges, no fraying, no babysitting. The setup takes longer upfront, sure, but on a long run it pays for itself fast. There's also water-soluble stabilizer (I've got a whole separate video on that one, actually, link's around somewhere), which a lot of people love for how easy cleanup is. And cutters, Graphtec, even a Cricut, believe it or not, work for pre-cutting an applique-style patch.
Finish is the flip side of cut, and honestly they're kind of joined at the hip. Iron-on backing or a temporary adhesive (so it holds while a customer sews it themselves) is our go-to. Velcro's an option too, though it demands more equipment and a bit more know-how. Or nothing at all, no backing, just raw fabric ready to be sewn straight on.
Decision Five: Placement and Sequence
Nobody talks about this one enough, and it drives me a little crazy, because it's probably the sneakiest time-eater in the whole process. Do you stitch one full patch color-by-color before moving to the next? Or do you knock out every instance of one color across all patches first, then move on?
Minimizing color changes is almost always the smarter move. Every cut, every thread change, that's time. And forty-five seconds might sound trivial, until you multiply it by eighteen patches on a hoop, and then multiply that by six or twelve production runs. Suddenly your "tiny" inefficiency has quietly eaten an hour of your day. Profit just... evaporates.
What's Your Reaction?